this is a page for

Category: Cricut Crafts

DIY Personalized Wood Round

Are you ready for a simple project to kick off the summer?  You will not believe how easy it is to make this beautiful door hanger.  You can change up the colors and make it fit any season or occasion. 

Materials and Tools:

Staple Gun – https://amzn.to/43If6yl

Staples – https://amzn.to/3OVHPvm

Rafia – https://amzn.to/45KpXd4

Eucalyptus Stems – https://amzn.to/3IYX038

Lavender Stems – https://amzn.to/3MJppvi

Wood Rounds – https://amzn.to/3OSxnFb

Jute Twine – https://amzn.to/43GJGbz

Waverly White Chalk Paint – https://amzn.to/43pxqwt

Cricut Explore 3 – https://amzn.to/43DvyAB

Black Permanent Vinyl – https://amzn.to/3qqZNvG

Silver Permanent Vinyl – https://amzn.to/3Cb8lcy

Affiliate links above allow me to gain a small commission off your purchase, at no cost to you.  Thank you in advance for your support 😊

Don’t forget to get my SVG file in the library or customize your own.  

I started out by painting my 14″ wood round with the white Waverly chalk paint on both sides and the rim.  

While the blank was drying I used my Cricut machine to cut out my design, weeded and placed it on my transfer tape.  I placed the letter “B” on the round first leaving as much room at the top as possible.  Next, I placed the “Welcome to our home” decal in the middle of the letter, trying to center de design.  I burnished both pieces and slowly removed the transfer tape.  

In order to dress up the round, I took a eucalyptus stem and cut four pieces about 4″ long and four pieces about 4″ long of a lavender stem.  Then, I stapled the stem pieces as close to the middle as possible leaving the outside pieces stick out on the outside of the round.  In order to cover up the staples, I wrapped a piece of raffia around my hand four times, made a bow, and stapled it in place. 

In order to create a hanger for the wood round I cut a 6″ piece of twine, folded it in half, and stapled the ends to the middle top of the back side of my wood round.

Click on the link for the video tutorial: https://youtu.be/AU0i4dH2cWc

Don’t forget to share your project on underneath my video tutorial.  Your creativity is my inspiration.  

Happy Crafting

How To Make a Spread Kindness Not Germs Label with Cricut Joy

Fun Labels

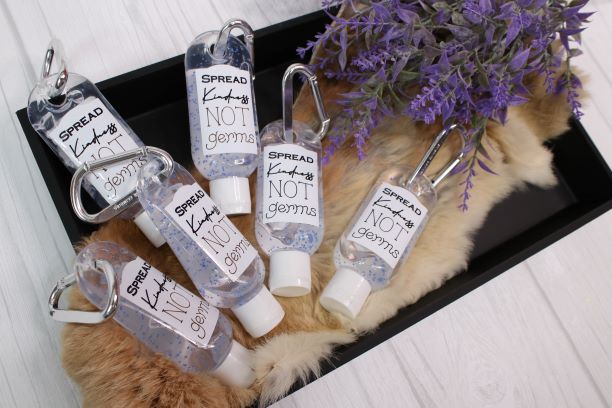
How adorable are these hand sanitizer bottles with the new labels I designed and made?  And how awesome is the fact that all I needed to make them is my Cricut Joy machine, Smart Writable Vinyl, and two Cricut Joy pens?  I can tell you it feels amazing.  I wanted so somehow personalize the bottles to provide as a gift for my customers at our Wild West Photo Shop in Helen, GA.  And although we are practicing social distancing right now, these little gems will come in handy when life goes back to normal and business as usual.  

Get the free file for  your label HERE

Or just fill out the form below.  

Do I need a Cricut Joy?

Just because I used the Joy to make my labels does not mean that you have to.  Use your Cricut Make or Explore machine to do the job.  Of course you will have to cut the writable vinyl to size and place it on your 12″x12″ or 12″x24″ mat, but that is totally doable.  

TOOLS

Cricut Joy ( or Maker/Explore)

Cricut Joy Pens (or Maker Pens)

Mat (for Maker/Explore)

Instructions

Step 1.  Start by doing to my resource library and downloading the Spread Kindness Not Germs label.  Enter the library HERE

Step 2.  Import the Spread Kindness Not Germs Label into Cricut Design Space.

Upload Instructions:
– Go do Cricut Design Space
– Click on New Project
– Click on Upload icon on the left-hand side on the very bottom
– Click Browse and find the downloaded file (make sure you unzip your file and upload the SVG only)

Step 3. Once uploaded, select the file by clicking once and click Insert Image on the lower right-hand corner. Cricut Design Space will take a few moments to upload your file. It may take longer if you file has a lot of elements.

Step 4.  Now you see the Label in Design Space. On the left-hand side you should see the layers of your design.  Design Space provides you with an explanation for every layer. Make sure to change the Cut to Draw on every word in your label. You can do that by clicking on the group of letters to select the whole word (or every letter individually). While the layer is selected go to Linetype in the top menu and change the Cut to Draw. Now repeat this for every word you want your Cricut Machine to Draw instead of Cutting. The only thing you should have as a cut is the outline of the label.

Step 5.  Select the label by clicking on it to view the size. You may drag the corner arrow to make it smaller or larger if you need to. NOTE – if you click to Make It at this time your mat will look something like this. Do not continue with your project. Hit Cancel on the bottom which will bring you back to your canvas. Click on Select All in the top menu and click on Attach on the very bottom of the layers menu. This step will ensure your label attached and the machine will draw first and then cut out the whole thing.

Step 6.  Choose your mat option (or Without Mat) on the left-hand side just below your Mat 1 preview. If you are using a mat make sure to view or move your label around on the preview mat by clicking and dragging it. I chose to cut my labels without the mat. Click Continue.

a. If you choose to use the matless option on Cricut Joy your material has to be at least 4” long. The machine will not cut closer than 1” from top and .5” from the bottom.
b. Do not use transfer tape for the Smart Writable Vinyl
c. Get Pens are not compatible with Writable Vinyl.

Step 7.  Make sure your machine is connected. Choose your machine you want to use in the top menu.

Step 8.  Select the material, I use smart Label Writable Vinyl and use more pressure.
11. Load Black pen (as per the instructions) and load material into machine. The Cricut Joy will feed in the material when it detects it.


Step 9.  Click GO on your computer.

Step 10.  Your machine will prompt you to change pen colors (if you used different colors) and press continue on your computer.

Step 11.  Your machine will prompt you to clip in the Fine-Point Blade and press continue on your computer.

Step 12.  Unload your material from your machine.

And just like this you are done with your label.  You may choose to edit the label by changing the wording.  You may choose to add images or shapes and make it your own.  

The only thing left is to place it on your hand soap bottle or your sanitizer dispenser.  

Enjoy 🙂

Affiliate Links

Craft Vinci may feature affiliate links.  If you decide to make a purchase using these links, I want to thank you from the bottom of my heart for supporting my blog.  It will be at no cost to you.  I also want you to know that I only ever recommend products or services that I truly believe in and used or use myself. 
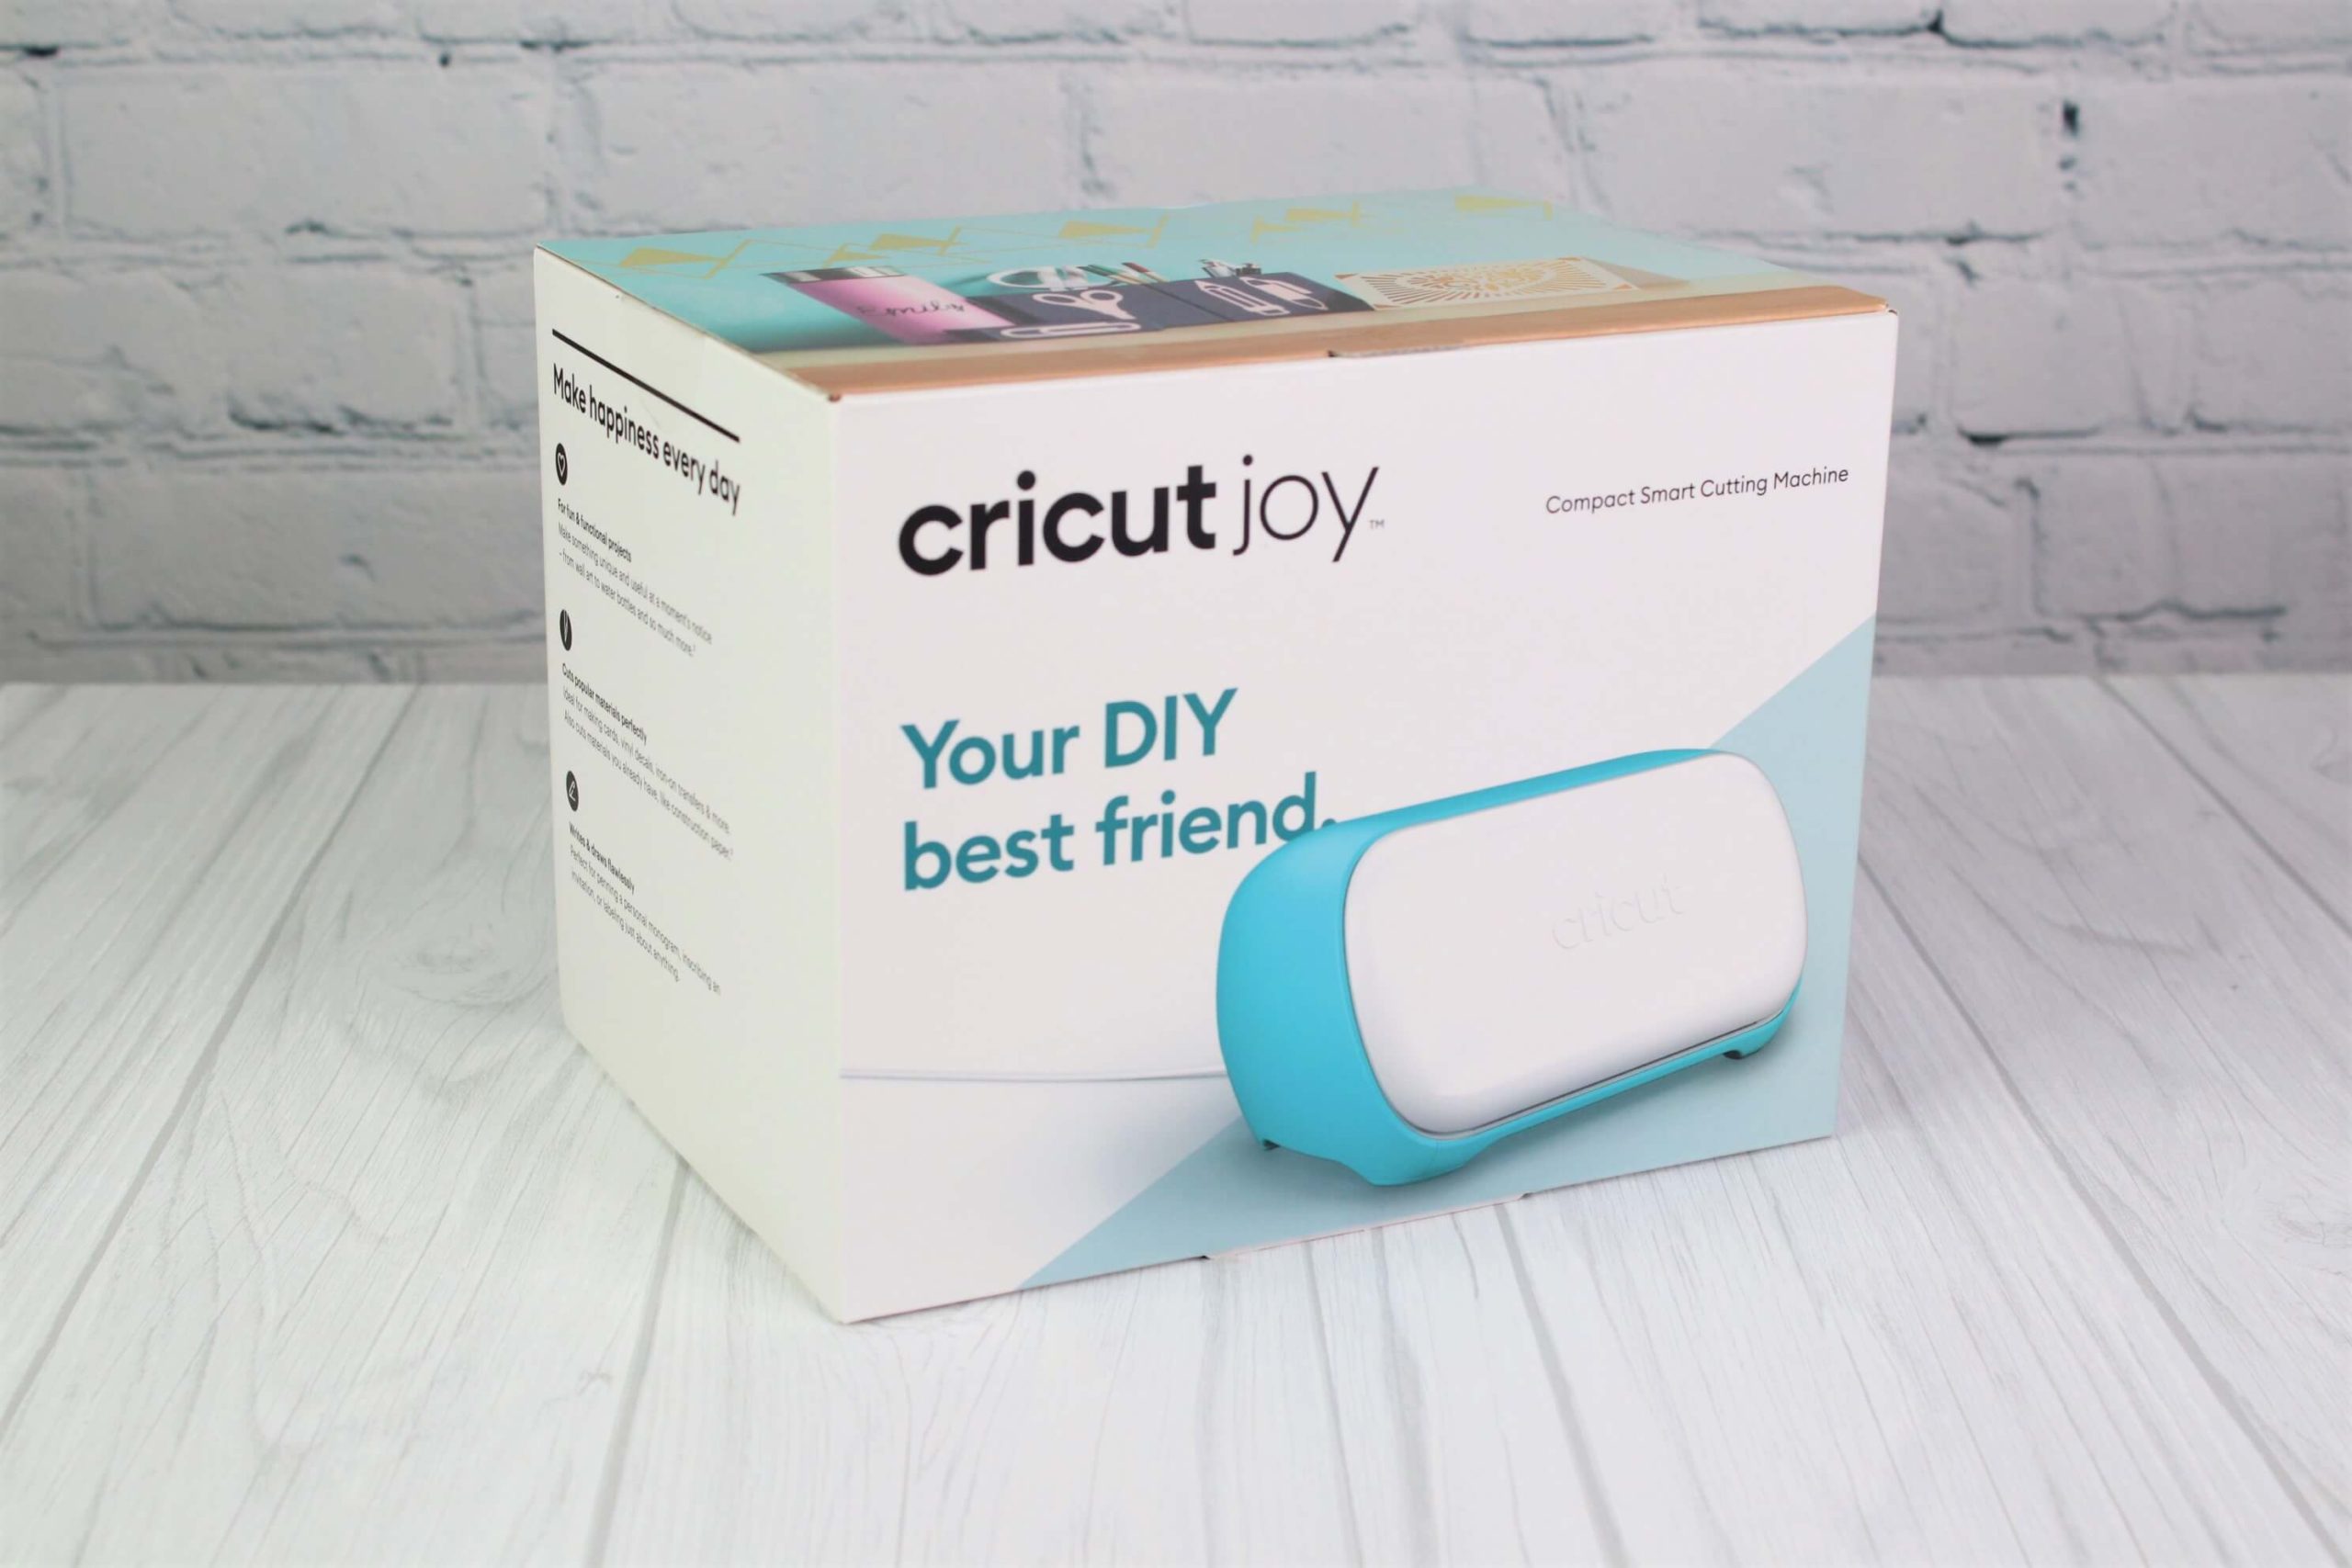
Hello Cricut Joy- Your New DIY Best Friend

WHAT IS CRICUT JOY?

The Cricut Joy is a compact electronic die cutting machine with the ability to write and draw.  When closed this little beauty is about 5″ by 8″ and weighs just under 4 pounds.  It is very portable due to its small size and needs only one cord to operate – the power adapter.  

Cricut Joy has absolutely no buttons and uses a Bluetooth connection to communicate with your computer, tablet, or even smartphone which means that you can use this great little tool right in your kitchen with no hassle.  

Cricut Joy Open Box

WHAT PROGRAM DO I USE?

Cricut makes it very easy to use their machine by providing a free companion app, Cricut Design Space where you can upload your own image files such as .svg, .dxf, .bmp, .jpg, . png, .gif for free.  You are also able to use the system fonts at no cost to you.  This is where you will be able to design your project. 

Cricut also offers a paid subscription which includes many more fonts, images, and thousands of ready to make projects.  

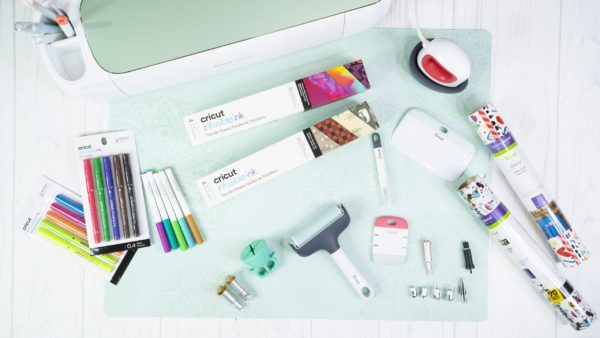
Don’t let the tiny size fool you.  This fun helper is able to cut a variety of materials such as paper, vinyl, heat transfer vinyl, and Infusible Ink transfer sheets.  

HOW MUCH DOES THE CRICUT JOY COST?

At this point you are probably wondering what your investment will have to be which is a very valid question.  This little crafting helper costs $179.00 US and it is available in a variety of stores such as Cricut.com Michaels, JoAnn, Hobby Lobby, and even Amazon.com.  

This cost is well below the price of a Cricut Maker at $349.99 or even the Cricut Explore Air 2 at $249.00.   This is a great investment price if this machine will make your life easier.  

Cricut Joy Opened

WHAT ARE THE NEW FEATURES CRICUT JOY HAS?


MATLESS CUTTING

If the small size is not having you jump for joy this little beauty is a first Cricut machine capable of matless cutting with the new “Smart” line of products due to their thicker backing.  Your material does have to be at least 4″ long to use this feature. 


CONTINUOUS CUTTING UP TO 20′

The Cricut Joy can cut images 4.5″ by 4 feet long and can repeat this for up to 20′ long using the Smart Vinyl.  Wall decals here we come.  


CRICUT JOY CARD MAT

Another bonus and I have to say that it is my favorite feature for the Cricut Joy is the brand new Cricut Joy Card Mat and Insert Card Sets. 

Being a busy mom and and a believer of spending what is necessary my motto has always been that you if I buy a gift, I do not include a card, and if I buy a card, that means I no longer include a gift. 

I always thought that cards, even though very cute, some extremely intricate, are expensive to include with a gift.  Don’t get me wrong, I design and make cards on my Cricut Maker all the time, but these are not 5 minute and done jobs.  These cards are carefully thought out, pour  my heart out cards.  

Now that I have my Cricut Joy I can design and make a beautiful, personalized card in just minutes.  You know, that five extra minutes my family waits for me in the car because I try to be on time but mostly manage to find a thousand things I need to do before I go?  Yes, that is me getting my brand new personalized card from my Cricut Joy as I run out the door. 

Card Joy

WHAT COMES IN A BOX?

The box includes the Cricut Joy cutting machine, power adapter, blade and housing, a standard grip mat (4.5″ x 6.5″), black fine point pen (0.4mm), 2 pieces of practice materials, welcome card, 50 ready-to make projects online, and free trial membership to Cricut Access for new subscribers.

THINGS TO REMEMBER

Cricut Joy tools such as blades, housing, pens, markers,  are for use in Cricut Joy only and are not interchangable with the Cricut Maker and Explore machines.

This mighty machine has only one blade option which is the fine point blade.  This means that it and cannot cut heavy duty materials some of us learned to love with our full size Cricut machines. 

SHOULD I GET A CRICUT JOY?

Cricut Joy is a great die cutting machine.  I totally love the Cricut Card Mat and the fact that I can make a 20′ vinyl boarder without using a mat.  

But the truth of the matter is that answer depends totally on you and your needs.  Circut Joy is a fun starter machine.  It has a lower price point, you can use it on a wide variety of projects, it is portable. 

Cricut Joy is also a great addition to your existing line of Cricut machines, if you have any.  At the end of the day, you must decide exactly what you are looking for and the kid of projects you will want to do in order to choose. 

So what do you think?  Will the Cricut Joy be the next little crafting helper?  


Affiliate Links

Craft Vinci may feature affiliate links.  If you decide to make a purchase using these links, I want to thank you from the bottom of my heart for supporting my blog.  It will be at no cost to you.  I also want you to know that I only ever recommend products or services that I truly believe in and used or use myself. 

Similar Posts

What Materials Work With Cricut Infusible Ink?
06 February 2020, 17:20
No Sew Fabric Ornament
10 December 2019, 01:37
Make a Spring Vintage Red Truck Centerpiece with a Bunny
09 April 2020, 19:33
Make a 2 Tier Tray
05 June 2020, 02:10

Can You Use Cricut Infusible Ink on Dark Color Shirts?

With so many questions surfacing regarding the Cricut Infusible Ink one that comes up quite often is whether it can be used on materials with dark colors. If I have a black or dark shirt as my project blank and I use the Cricut Infusible Ink transfer paper will it show up on the garment? The unfortunate answer is NO but let me explain this.
  • Cricut Infusible Ink 

For starters, let’s establish that Cricut Infusible Ink is a process similar to the Dye Sublimation process. Let me rephrase this. Cricut Infusible Ink is Dye Sublimation. 12”x12” thick sheets (more like cardstock) of Dye Sublimation paper are printed with a design or a solid color. This printed sheet is placed on a carrier sheet. I don’t know the specific process however I can only assume this to be the just of things.  To use the Cricut Infusible Ink my design has to be cut out of the transfer sheet.

– I mirror my image and cut it out on the ink side of the sheet leaving the carrier sheet not cut.

– Next, I weed my design. 

– I remove the surrounding pieces of ink sheet and left the desired image, just like I do HTV.

– I place my design is ink side down and carrier sheet up on the blank and press according to instructions.

– Once the press is done, I remove the carrier sheet and the design which leaves my project complete.

  • Dye Sublimation = No Weeding

I believe it is a bit easier to use Dye Sublimation. I have two dye sublimation printers and any time I want to sublimate something I simply make a design in Adobe Illustrator (or any other program even word or paint) remembering to mirror my image and print it on A-Sub paper.

– Then I press it according to the instructions provided with the paper, ink down.

– Once heat press lets me know the time is done, I carefully take off my butcher paper and remove the A-Sub paper which still has my image on it, just a little lighter because most of my ink became a gas and has bonded to the blank I used.

– And just like that my project is complete.

I am sure you are very familiar with vinyl, and although it has its limitations it is quite versatile. Black lettering on white shirts, white lettering on black shirts, black lettering on black shirts, right? Yes, of course. That is because the vinyl is opaque and it sits on top of the material you use.

When you take a dark-colored polyester blank and add any color Infusible Ink to it the pressed image will not be visible because the Infusible Ink is transparent. Also, the ink binds to polyester leaving the surface smooth.

I’m sure at this point you are wondering whether this process will work on any other color blank other than white, right? Starting with a white color surface is preferred.  White blanks will give you the most vibrant result. Also, Infusible Ink does not have white as a color. In order to get a white color, it is simply lack of color. This is why we must start with a white surface.
  • Any Other Color Blanks? 

Can you use any other colors of blanks? The short answer is yes, however, there are some things you must watch out for. If you must or want to use a color blank, you may want to consider getting it in a pastel or light color. Of course, then your Infusible Ink color should be darker in order to show up on your project.

Also, something I did not consider when I started dealing with sublimation is that if you use a color blank, your ink color may change due to the mix of colors between the blank color and the Infusible Ink colors. Who knew?

Cricut Infusible Inks come in a variety of fun patterns with more designs coming out. However, when you need to make a dark or black shirt your choices are limited to vinyl therefore you should plan your project accordingly. As always, if you have any questions or project ideas please email me directly. Also, don’t forget to check out my YouTube channel for fun project ideas. Happy Crafting 🙂
Affiliate Links

Craft Vinci may feature affiliate links.  If you decide to make a purchase using these links, I want to thank you from the bottom of my heart for supporting my blog.  It will be at no cost to you.  I also want you to know that I only ever recommend products or services that I truly believe in and used or use myself. 
8 Things to Remember When Using Cricut Infusible Ink

  Hello and welcome back. Circut Infusible Ink transfer sheets become more popular more questions are surfacing regarding using this process to personalize our projects.  Are you not sure what is an important step?  Which steps you can skip with Infusible Ink in your efforts to make it work?  I have to admit, I am the first person to skip a step if I don’t think it I totally needed.  I try to read what seems like important bullet points and omit the other nonsense more times than I can count on my two hands.  After all, I am a wife, a mom of three very active boys.  I  have three English Mastiffs and run several businesses.  This means that anytime I can skip an unnecessary step I will try it.   Then I can focus on something different.  This may be the reason why my kids are skeptical of my cooking.  Sometimes this means that I create an awesome shortcut.  Other times my project becomes an epic fail and I have to start all over admitting my defeat.  This is great news for you!  I can share my wins and fails with you and that is how you can skip this trial process.  Here is a list of 8 things to remember when planning and making a project with Cricut Infusible Ink transfer sheets.  100 Polyester Material is the Best.
  • The infusible ink or sublimation process binds only to polyester.  In order to have desired long time results that we all wish for, a 100% polyester blank should be used. You can use a material such as 80% polyester and 20% cotton blend.  By doing so, you have to understand that your results may vary. The sublimation process will not work with cotton, therefore, it is very likely that the colors of your image will wash out and may somewhat fade. There are many different blends of fabric available and some work better than others. Since I own a sublimation printer and I have tried it on many different surfaces including 100% cotton t-shirt.
  • I made a cotton shirt for my youngest son right after I got my sublimation printer. Not only did it not transfer correctly but it was also very dull.  After just one wash almost all the color was gone leaving his shirt with a very faint image that looked more like a stain. Yikes, not the results I wanted for sure.
White or Light Color Blanks Only.
  •  Another thing to consider when transferring an image with infusible ink or sublimation is that it works only on light color materials, preferably white. The ink is transparent therefore the darker your material color the less likely it is to show up. It will still bind to the polyester but will not be visible which defeats the purpose of your whole project.  Pastel color blanks also work well however they may change the final color of your design.  
  New Butcher Paper Every Time.
  • Remember to use a new piece of butcher paper underneath your project to protect your EasyPress mat.  Place another one on top of the project to protect your easy press itself. Also, I tend to put the butcher paper inside the shirt. The gas can bleed to the back of the shirt. While processing a large order of shirts for a client, I protected the surface of my pad and my press.  But the ink bled to the back of the shirt ruining a few shirts. Thankfully I realized it within the first few shirts I pressed and was able to avoid this mistake in the following shirts. I know that it seems wasteful and a little redundant but trust me on this one.
  • The ink becomes a gas, there is a good chance it will come into contact with whatever material it is pressed onto or with. The Cricut Infusible Ink and sublimation are permanent and cannot be washed out, especially from polyester surfaces much like the easy press mat, it is then likely to transfer back onto other items you press.
Remove All Lint.
  • Another thing to remember when using the Infusible Ink is to remove possible lint or hair. Try not to skip this step because the ink will not be able to go around fuzz you may not even see and will create a blank spot on your image.
Press Your Blank.
  • Your project surface needs to be pre-pressed to get the moisture and wrinkles out before you place your image on it. 
Press Only One Time.
  • Once the image is pressed onto the material, you should never repress it.  You can layer your different colors and varieties of HTV.   Repressing over the already placed image can cause ghosting or image distortion. You know, the whole gas thing again.
Make Sure You Mirror Your Image.
  • I have been crafting for many years now and I own a sublimation business. I still make the mistake of not mirroring my image sometimes. Last week, my printer rep set up my printer for the automatic mirroring so I, nor my employees, would ever forget this step again. I was printing my design for the YouTube channel and I was so proud of myself for not forgetting to mirror my image.  I forgot that the printer flipped the mirrored image back. Because I was in a hurry I did not even check it before I pressed it on the video. I realized it when I finally looked at the already made sock. This is why I usually check everything two or three times.
Check Your Heat Settings With Your Blank.
  • Use the correct temperature and time settings. With that being said, the heat settings provided to us by Cricut Heat Guide are for Cricut Blanks. If you are using blends or other material, Cricut does not guarantee the same results. Also, your temperature and time may vary especially if you are using any blends containing spandex.  This tends to scorch quite quickly.
I know this list of 8 Things to Remember When Using Cricut Infusible Ink seems like a long list of to-do and not to-dos. Yes, it is very easy to forget a step when you are first learning how to use the Cricut Infusible Ink.  Don’t worry, with a little practice you will become a pro in no time.  Now it is time for you to try.  Make sure to share your beautiful work.   As always, don’t hesitate to email me your questions or suggestions for new tutorials.  I love to hear about your wins because they need to be celebrated.  And remember that your fails are just a path to your success so don’t be scared to try something new.   Happy Crafting 🙂
Affiliate Links

Craft Vinci may feature affiliate links.  If you decide to make a purchase using these links, I want to thank you from the bottom of my heart for supporting my blog.  It will be at no cost to you.  I also want you to know that I only ever recommend products or services that I truly believe in and used or use myself. 

What Materials Work With Cricut Infusible Ink?

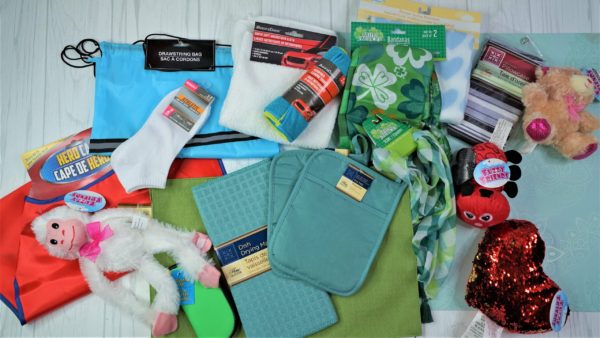
        Have you tried it yet? Or are you scared you will mess something up? Cricut Infusible Ink is truly an amazing craft product. However, just like any other product on the market, it has its pluses and minuses. The ink is permanent therefore your projects will not chip or fade which is great news because as crafters, we want our hard work to last a long time. Cricut has many blanks available, but what if you want more? What if you are looking for something unique, one of a kind? Your first option is to scour the internet and if you are looking for quantity pricing for your projects you will be able to find many online stores specializing in sublimation blanks and polyester products. Amazon and eBay are also great resources for your blanks, although they are somewhat limited compared to specialty stores. As a beginner, you will want to find low cost, readily available products to buy to try out. I have good news for you. You can find products at your local store to personalize with Cricut Infusible Ink. Yes, even the Dollar Tree. Do you know what will work? I must admit that my first encounter with the Infusible Ink was less daunting once I realized that the process is much like the Dye Sublimation process. One of the most important things you must remember when choosing your blank to personalize is that the Infusible Ink or Dye Sublimation will bond to the polyester surface as well as the fact that the blank should be preferably white or very light in color to show up. Now the next question you are thinking is how do you know for certain? This is a good question, but you simply read the label. Most products have a very clearly marked product description. This is specifically true in apparel. All you need to do is read the tag in most cases, it will provide you with fiber content. You are looking for preferably 100% polyester products or as close to 100% as possible. One of the more important tips I can provide you with is that most common types of microfibers are made with polyester, or polyester blends therefore it is ready for Cricut Infusible Ink. This includes bedsheets (I can see you making cute pillow shams for every occasion), towels, and even blankets. Did you know that sequins are polyester? Did you see those cute pillows or shirts with sequins that once moved to one side or the other reveal a secret message? Look at these cute Dollar Tree pillows I made with the Cricut Infusible Ink. Are you finally getting excited? Many backpacks and tote bags are made with polyester, just remember to check the tags. Shirts, tights, hats, socks, notebook covers…. There really are endless possibilities. Just to prove to you that I went to my local Dollar Tree and I picked up all these wonderful items I later personalized with Cricut Infusible Ink. This should sound less scary than when we first started. The last thing I want to add is that we all know not all products are created equal. Cricut states that Cricut brand blanks are best to use with Infusible Ink which makes sense. And even though other items may appear to be polyester or some kind of a blend, our results may vary even if we follow the instructions to the letter.   Look at all these goodies I picked up from the Dollar Tree.Dollar Tree Buys for Infusible Ink Trials Once you realize that polyester products are literally everywhere you will be able to come up with many new projects.   Happy Crafting 🙂   P.S.  If you have any questions or project ideas don’t forget to email them to me at hello@craftvinci.com.  Also, check out my YouTube Channel for instructions.
Affiliate Links

Craft Vinci may feature affiliate links.  If you decide to make a purchase using these links, I want to thank you from the bottom of my heart for supporting my blog.  It will be at no cost to you.  I also want you to know that I only ever recommend products or services that I truly believe in and used or use myself.